Invoices in Worklog360 allow you to bill clients based on tracked time and budgets. They provide a clear way to track billed work, manage client payments, and ensure financial transparency.
Step 1: Creating an Invoice
-
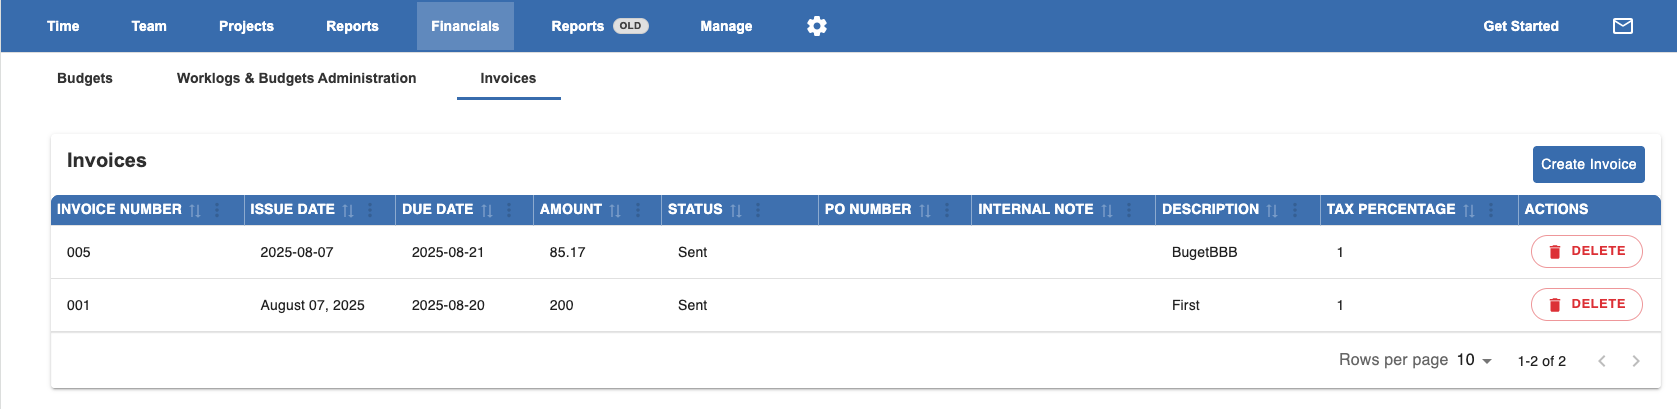
Click Create Invoice in the Invoicing menu.
-
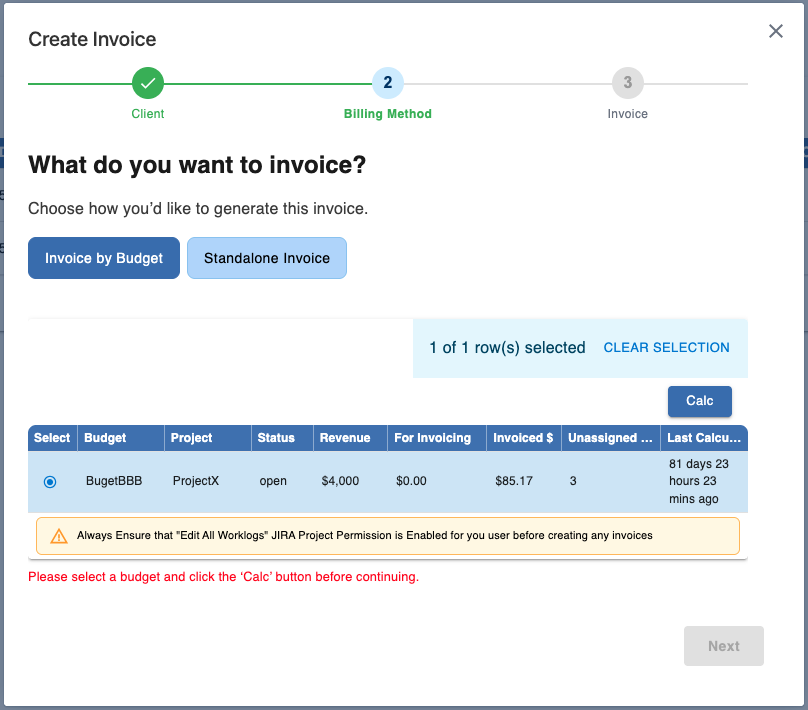
Select the client for which you want to create the invoice to.
-
After that you will see a list of budgets from which you can generate an invoice.
-
Select a budget to include in your invoice. Always make sure you click Calc before continuing. If you see Unassigned Worklogs you need to go back to Worklogs & Budget Administration to fix that.
-
You also have the option to create a standalone invoice, not linked to any budget.
-
Step 2: Invoice Preview
After selecting budgets or creating a standalone invoice, you’ll be taken to the Invoice Preview screen. Here you can:
-
Choose how the lines from the budget appear on the invoice
-
Set the Invoice Number
-
Define the Issue Date and Due Date
-
Review all amounts and ensure they are correct
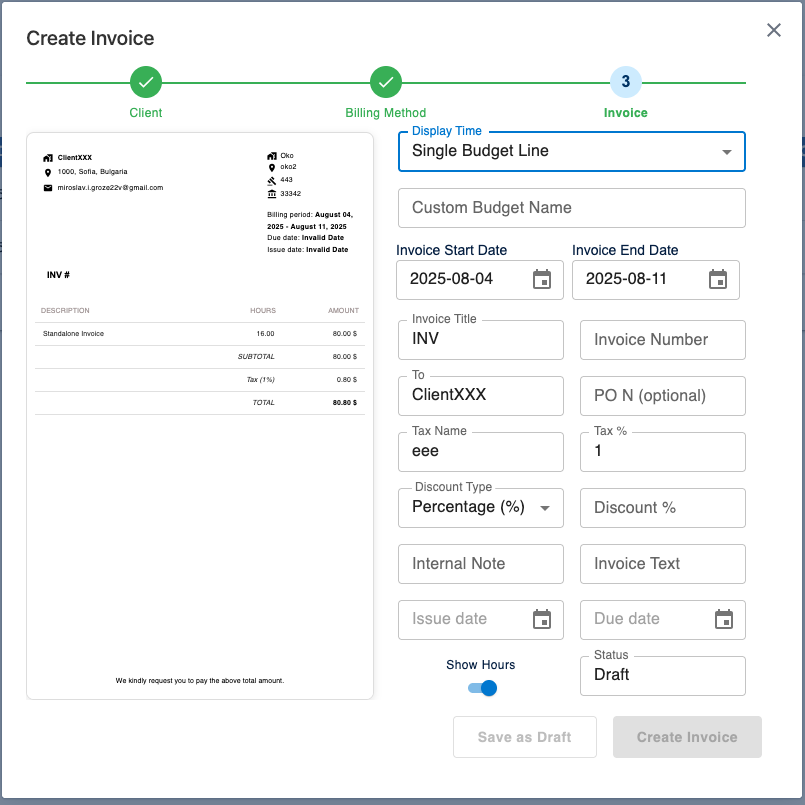
Step 3: Saving or Sending the Invoice
-
Save as Draft – Keeps the invoice in draft status for review or edits.
-
Crate Invoice – Changes the invoice status to Sent, making it ready for the client. You can print it into PDF. Also all related to that invoice worklogs are marked as invoiced now and reports will be updated.
Tip: Always double-check line items, dates, and amounts before creating to avoid errors in client billing.
Summary
Worklog360 invoicing is fully integrated with your budgets and worklogs:
-
Invoices can be generated directly from budgets, ensuring accuracy
-
Standalone invoices allow billing for work outside of budgets
-
Draft and Sent statuses give you flexibility in managing client billing