This guide explains how to generate an invoice directly from a project or client budget in Worklog360 using billable Jira worklogs.
With Worklog360, invoicing happens where the work happens — in Jira — without spreadsheets, exports, or manual calculations.
Why invoice from a budget?
For agencies and service companies:
-
Time is logged in Jira
-
Rates vary by role, person, or project
-
Budgets define what can be billed
A budget is the single source of truth that connects:
time → rates → money → invoice
Step-by-step: Jira project invoicing in Worklog360
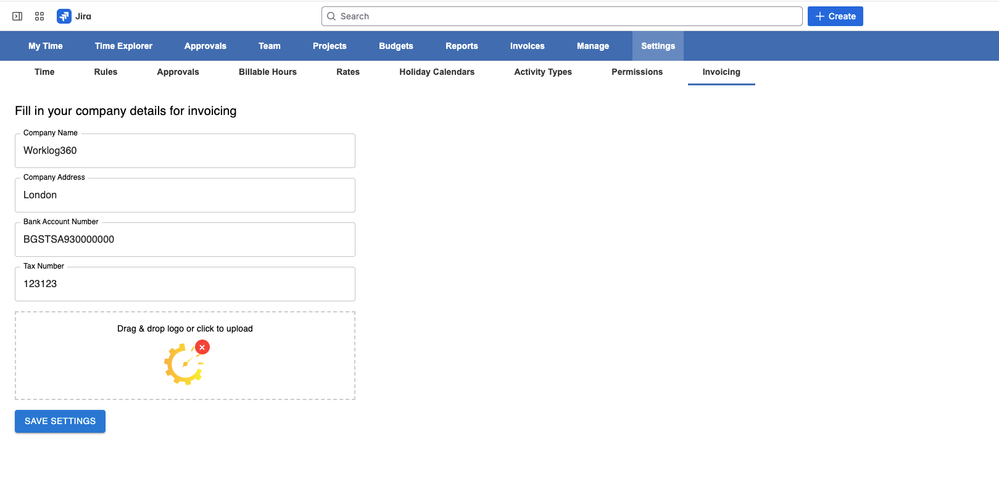
Step 1: Add your organization details (one-time setup)
Before creating invoices:
-
Go to Worklog360 → Settings → Organization
-
Enter:
-
Company name
-
Address
-
Billing details
-
These details will automatically appear on all invoices.
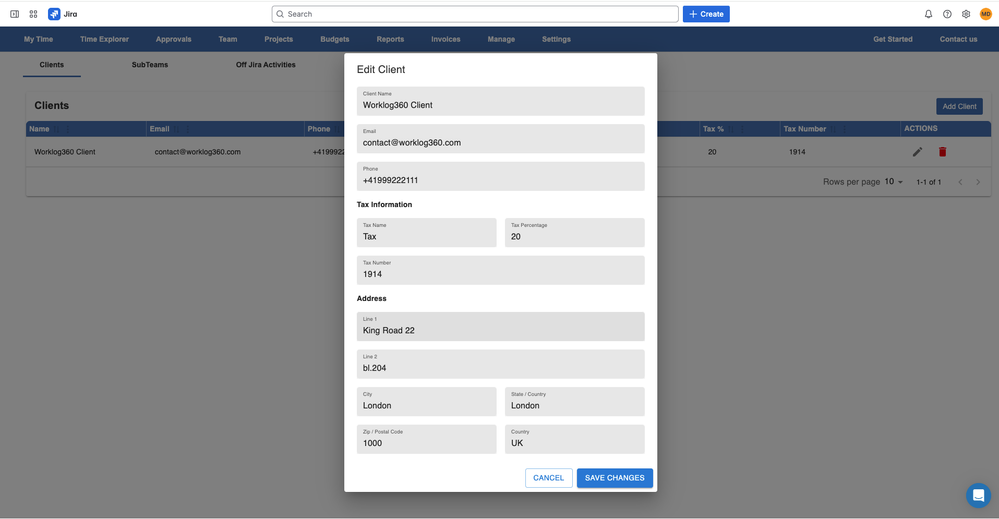
Step 2: Create the client
-
Go to Worklog360 → Manage -> Clients
-
Add:
-
Client name
-
Billing address
-
Contact person
-
Currency
-
📌 Each invoice is always linked to a client.
Step 3: Set billable rates in advance
Worklog360 supports flexible, role-based rate management.
You can define billable rates at multiple levels:
-
Site level – default rate
-
Person / Role level – different rates per role or user
-
Project / Client level – project-specific rates
-
Project members level – different rates for people in the same project
-
Worklog level – override rate for a specific entry
📌 When time is logged, the correct rate is applied automatically.
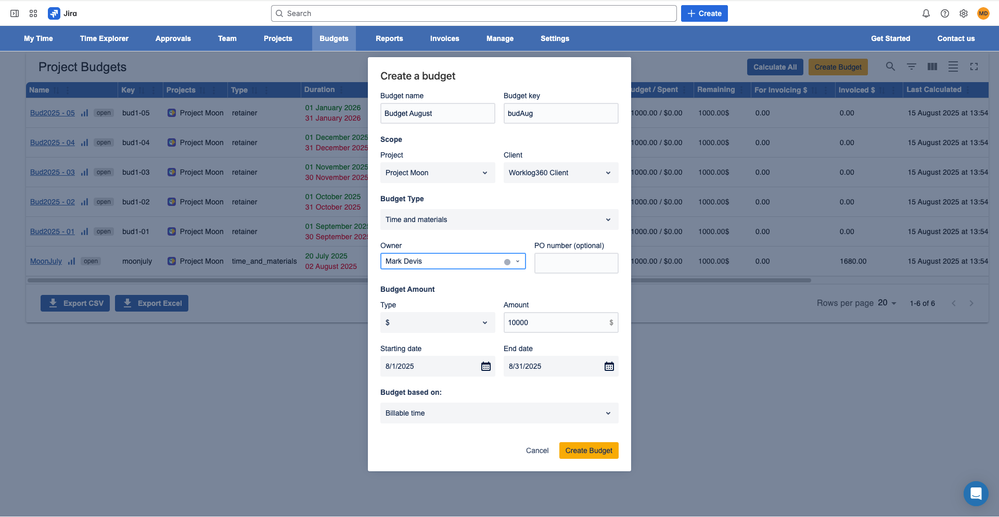
Step 4: Create and link a project budget
Budgets define what can be billed and over which period.
-
Go to Worklog360 → Budgets
-
Click Create Budget
-
Configure:
-
Budget name
-
Client
-
Jira project
-
Budget type (Time & Material or Retainer)
-
Amount (money or hours)
-
Start and end date
-
Worklog360 automatically assigns worklogs to the budget based on:
-
Jira project
-
Worklog start date
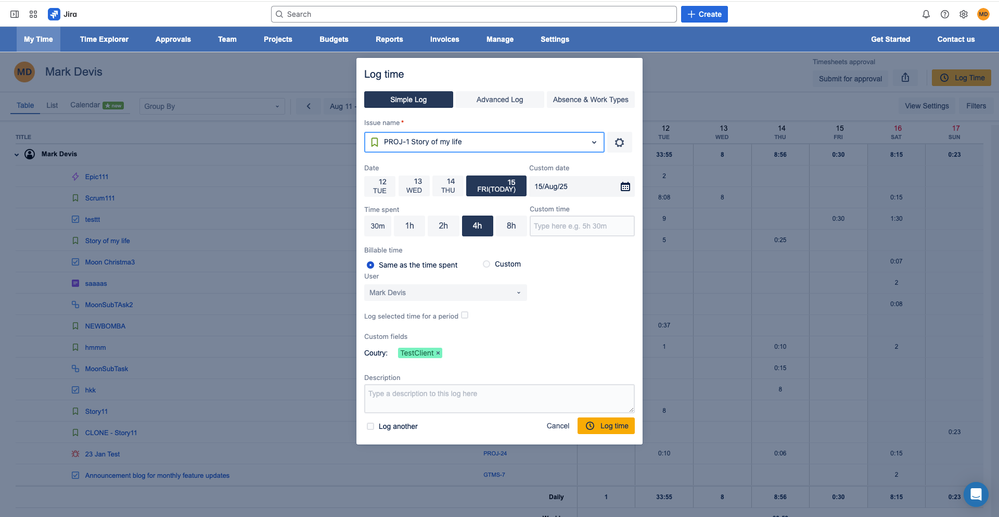
Step 5: Log time in Jira
When your team logs time using the Worklog360 Log Time form:
-
Billable hours are applied (by default)
-
The correct billable rate is attached
-
The worklog is linked to the correct budget
📌 No manual tagging is required.
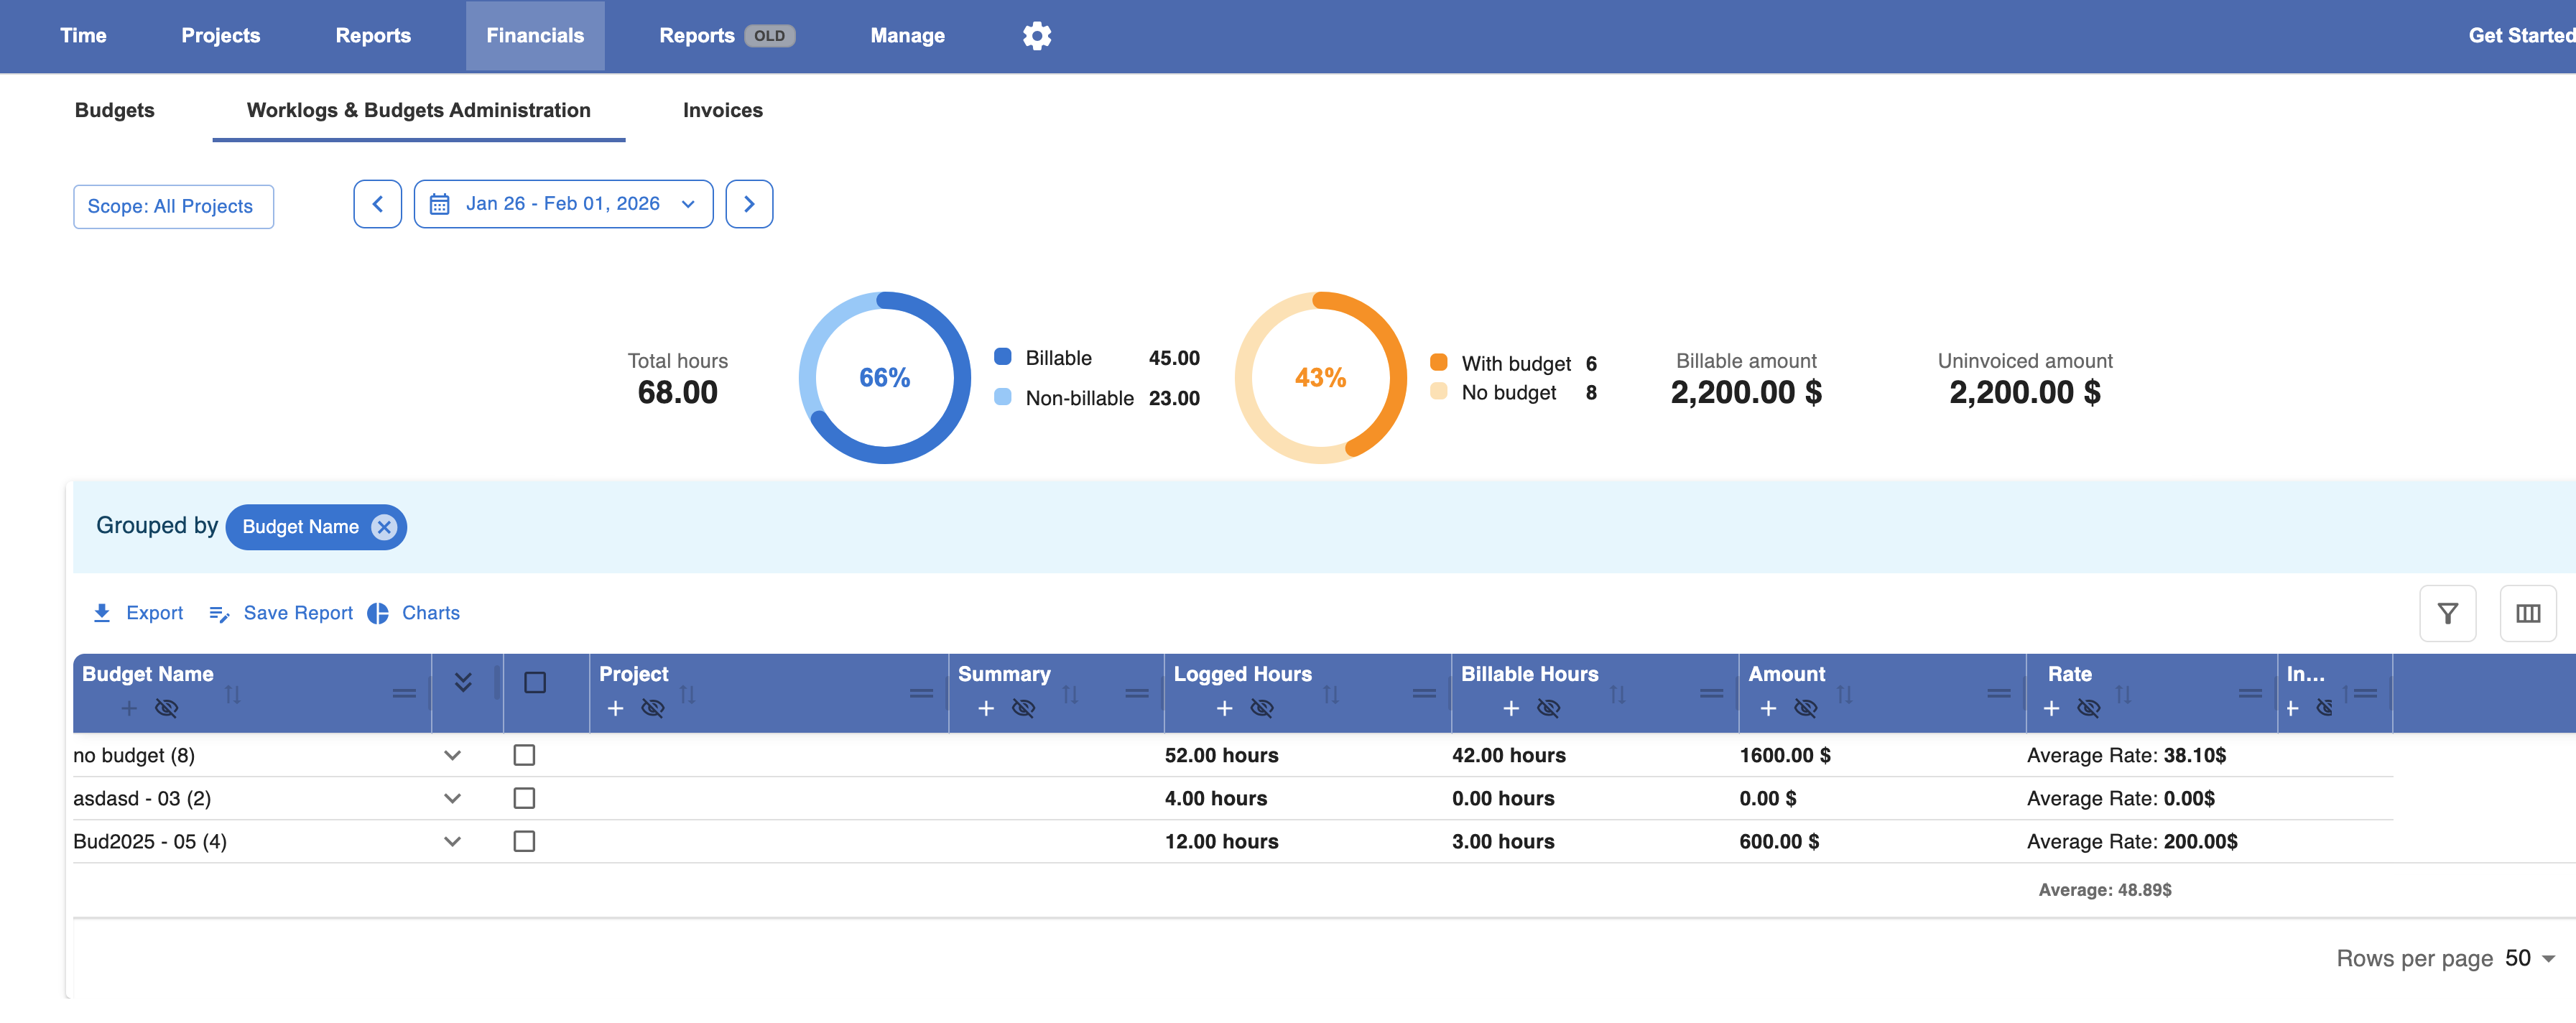
Step 6: Review budgets and worklogs before invoicing
Before creating an invoice, review your data:
-
Open the budget to see:
-
Billable time
-
Consumed amount
-
Remaining budget
-
-
Use Financials / Worklogs Administration to inspect individual entries
Need corrections?
-
Use Bulk Edit to:
-
Add or remove worklogs
-
Adjust billable hours
-
Update rates or assignments
-
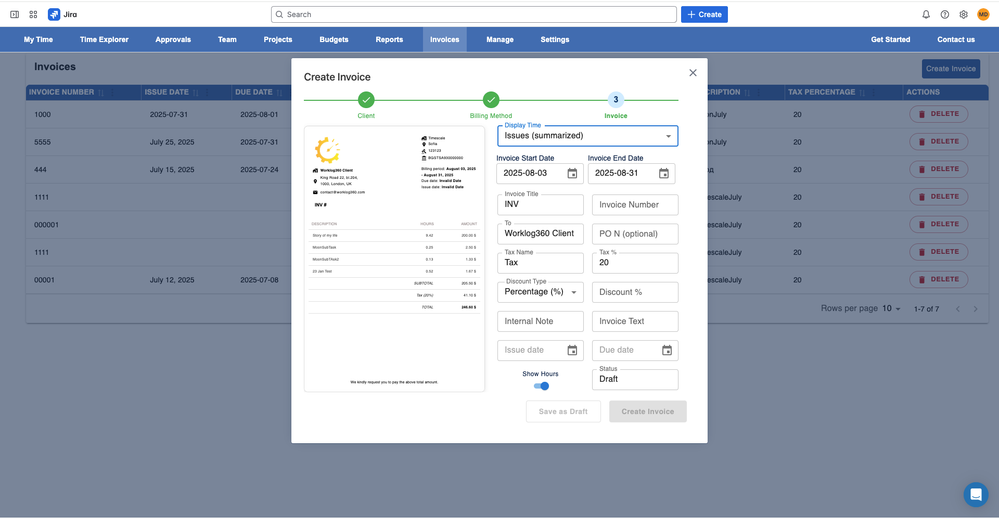
Step 7: Create the invoice from the budget
-
Go to Financials → Invoices
-
Click Create Invoice
-
Choose:
-
Which client to invoice
-
Which budget to invoice (Make sure you click calc to check and include missing worklogs and amounts)
-
Invoice granularity:
-
Per worklog
-
Per user
-
Per issue
-
-
-
Preview the invoice
📌 The preview shows exactly how the invoice will look before finalizing.
Step 8: Finalize the invoice
Once the invoice is finalized:
-
Included worklogs are automatically marked as Invoiced
-
Invoiced and uninvoiced amounts are clearly tracked
-
The same worklogs cannot be invoiced twice
After invoicing
You can now:
-
Export or sync the invoice (depending on your setup)
-
Track uninvoiced work
-
Prepare the next billing cycle with confidence
Extra tip for service companies
💡 Keep rates, budgets, and client details up to date.
When everything is configured correctly, invoicing becomes a one-click step at the end of each period.
Summary
By setting up:
-
Clients
-
Role-based rates
-
Project budgets
Worklog360 turns Jira worklogs into ready-to-send invoices in minutes.
No exports.
No manual math.
No missed billable hours.