What are billable and cost rates in Worklog360?
Billable rates define how much you charge clients per hour, while cost rates represent your internal cost, enabling accurate profitability tracking.
-
Billable rate → Revenue (what you invoice)
-
Cost rate → Expense (your internal cost)
👉 Together, they power:
-
Revenue calculation
-
Cost tracking
-
Profitability analysis
-
Invoice generation
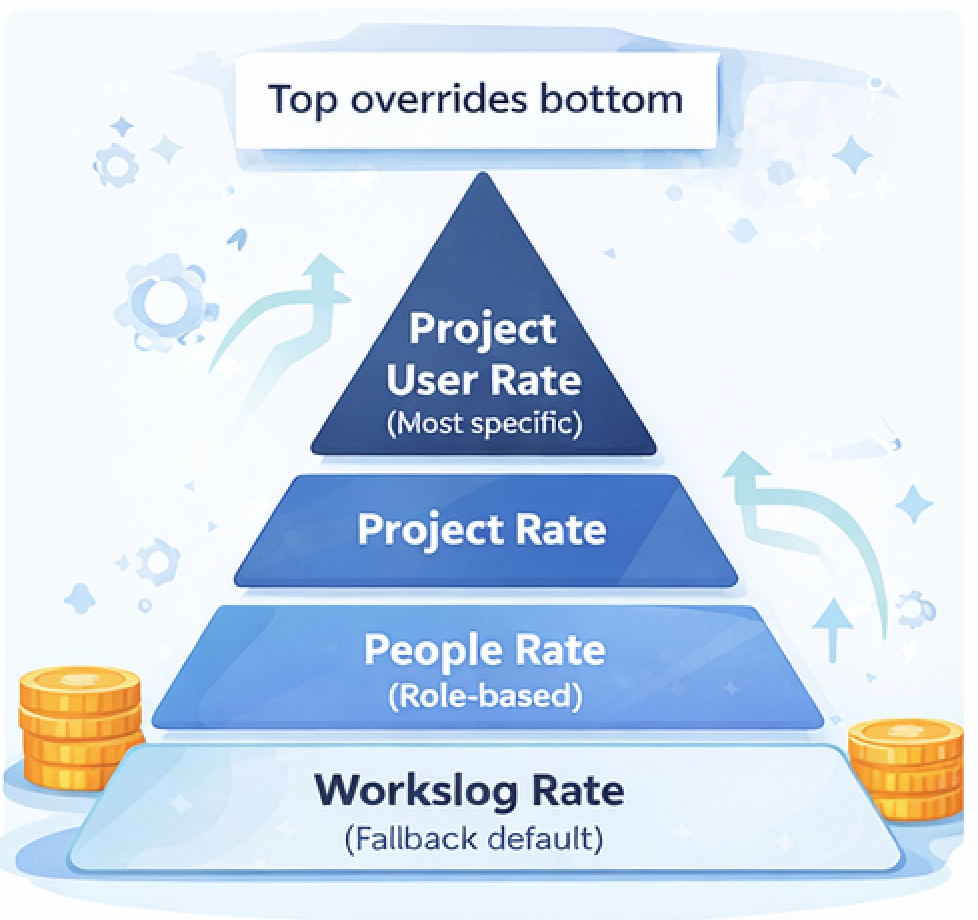
How does rate hierarchy work in Worklog360?
Worklog360 applies rates using a hierarchy where more specific rates override more general ones.
Rate hierarchy (from lowest to highest priority):
-
Workspace rates (global default)
-
People rates (via roles)
-
Project rates
-
Project user rates
👉 The most specific match always wins
How does Worklog360 decide which rate to apply?
When time is logged via Worklog360 Time Forms, the system evaluates rates from most specific to most general and applies the first match found.
Evaluation order:
Project User → Project → People (Role-based) → Workspace
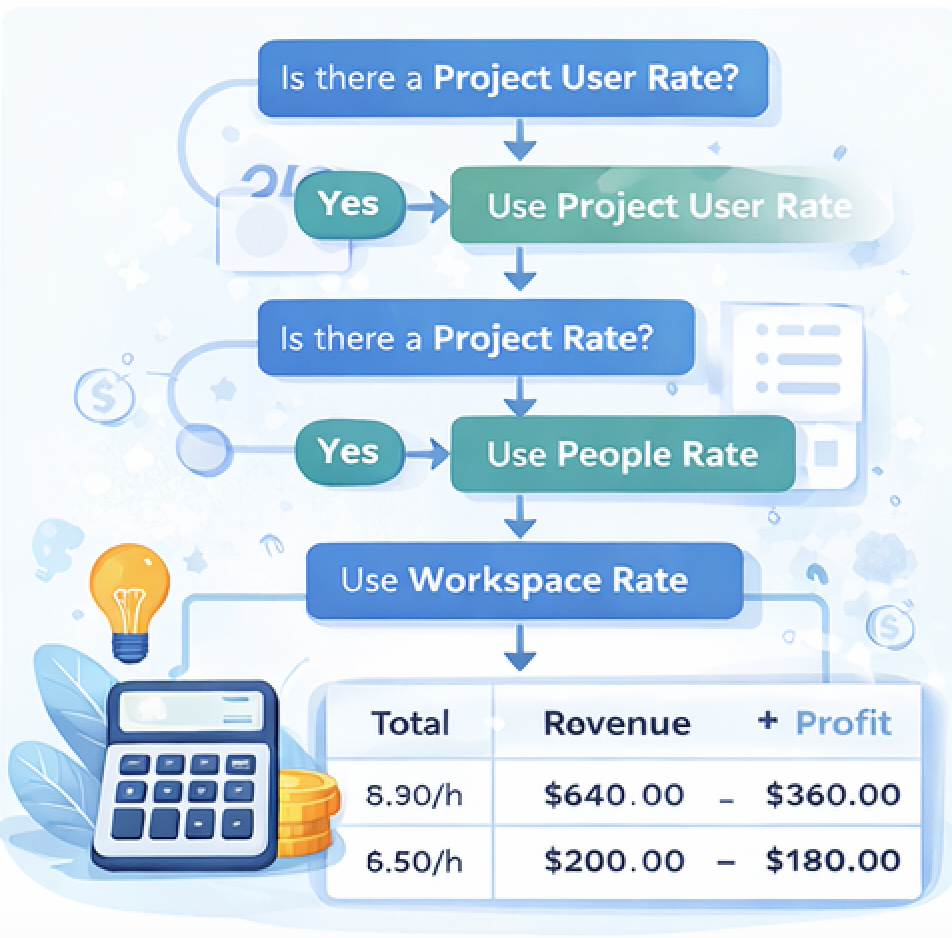
Example:
-
Workspace = $50/h
-
Role (Developer) = $60/h
-
Project = $70/h
-
Project User = $80/h
👉 Final applied rate = $80/h
How to set Workspace (global) rates
Workspace rates act as fallback defaults when no other rates are defined.
Steps:
-
Go to Settings → Rates
-
Set:
-
Default billable rate
-
-
Save
👉 Always configure this first
How to set People (user-level) rates in Worklog360
User-level rates in Worklog360 are managed through roles—you first define roles with rates, then assign those roles to users.
This ensures:
-
Consistent pricing
-
Easy scaling
-
Centralized rate management
Step 1: Define roles and rates
Roles act as reusable pricing templates that include billable rates.
Steps:
-
Go to Manage / Roles & Rates
-
Create a role (e.g. Developer, QA, Project Manager)
-
Set:
-
Billable rate
-
-
Save
👉 Example:
-
Developer → $70/h billable, $30/h cost
Step 2: Assign roles to users
Users inherit rates by being assigned a role in the People & Rates section.
Steps:
-
Go to Manage / People & Rates
-
Select a user
-
Assign a role
-
Save
👉 The user will now use:
-
The role’s billable rate
-
The role’s cost rate
How People rates fit in the hierarchy
Role-based user rates apply unless overridden by project or project-user rates.
Hierarchy position:
Project User → Project → People (Role-based) → Workspace
Example
-
Role: Developer → $70/h
-
User: John → assigned Developer
👉 When John logs time:
-
Default rate = $70/h
Unless overridden by:
-
Project rate
-
Project user rate
How to set Project-specific rates
Project rates override workspace and people rates for all work within a specific project.
Steps:
-
Go to Manage → Projects & Rates → Add Project
-
Set:
-
Billable rate
-
-
Save
👉 Ideal for:
-
Client-specific pricing
-
Retainers
-
Fixed contracts
How to set Project User rates (most specific)
Project user rates define custom rates for a specific user within a specific project.
Steps:
-
Go to Manage → Projects & Rates → Click on a Project from the list
-
Select a user
-
Set:
-
Billable rate
-
-
Save
👉 Ideal for:
-
Senior vs junior pricing
-
Special agreements
-
Exceptions
When should you use each rate level?
Each rate level serves a different purpose depending on how specific your pricing needs are.
|
Scenario |
Recommended Level |
|---|---|
|
Default fallback |
Workspace |
|
Standard team pricing |
People (Roles) |
|
Client-specific pricing |
Project |
|
Special cases |
Project User |
What happens when no rate is defined?
If no rate is set, Worklog360 falls back to workspace rates or may result in zero-value calculations depending on configuration.
👉 Best practice:
-
Always define workspace rates
-
Ensure all users have roles assigned
How to ensure correct rate setup
Proper rate setup ensures accurate billing, reporting, and profitability tracking.
Best practices:
-
Start with workspace defaults
-
Define roles before assigning users
-
Assign roles to all active users
-
Use project rates for client pricing
-
Use project user rates only when needed
-
Test with a sample worklog
How rates impact invoicing and profitability
Rates determine how worklogs are converted into revenue and cost, directly affecting invoices and profitability.
Flow:
Worklog → Rate applied → Revenue & Cost → Profitability → Invoice
👉 Incorrect rates = incorrect financial data
Final takeaway
Worklog360’s hierarchical rate system allows you to manage simple or complex pricing models while ensuring every worklog is converted into accurate financial results.
👉 Start simple:
-
Workspace + Roles
👉 Then scale:
-
Add Project and Project User rates as needed