This guide explains how to log billable time using the Worklog360 worklog form. (Make sure billalbe hours tracking is first enabled by your admin in Worklog360 Settings)
Step 1: Open the worklog form
Open a Jira issue and click Log work [Worklog360]
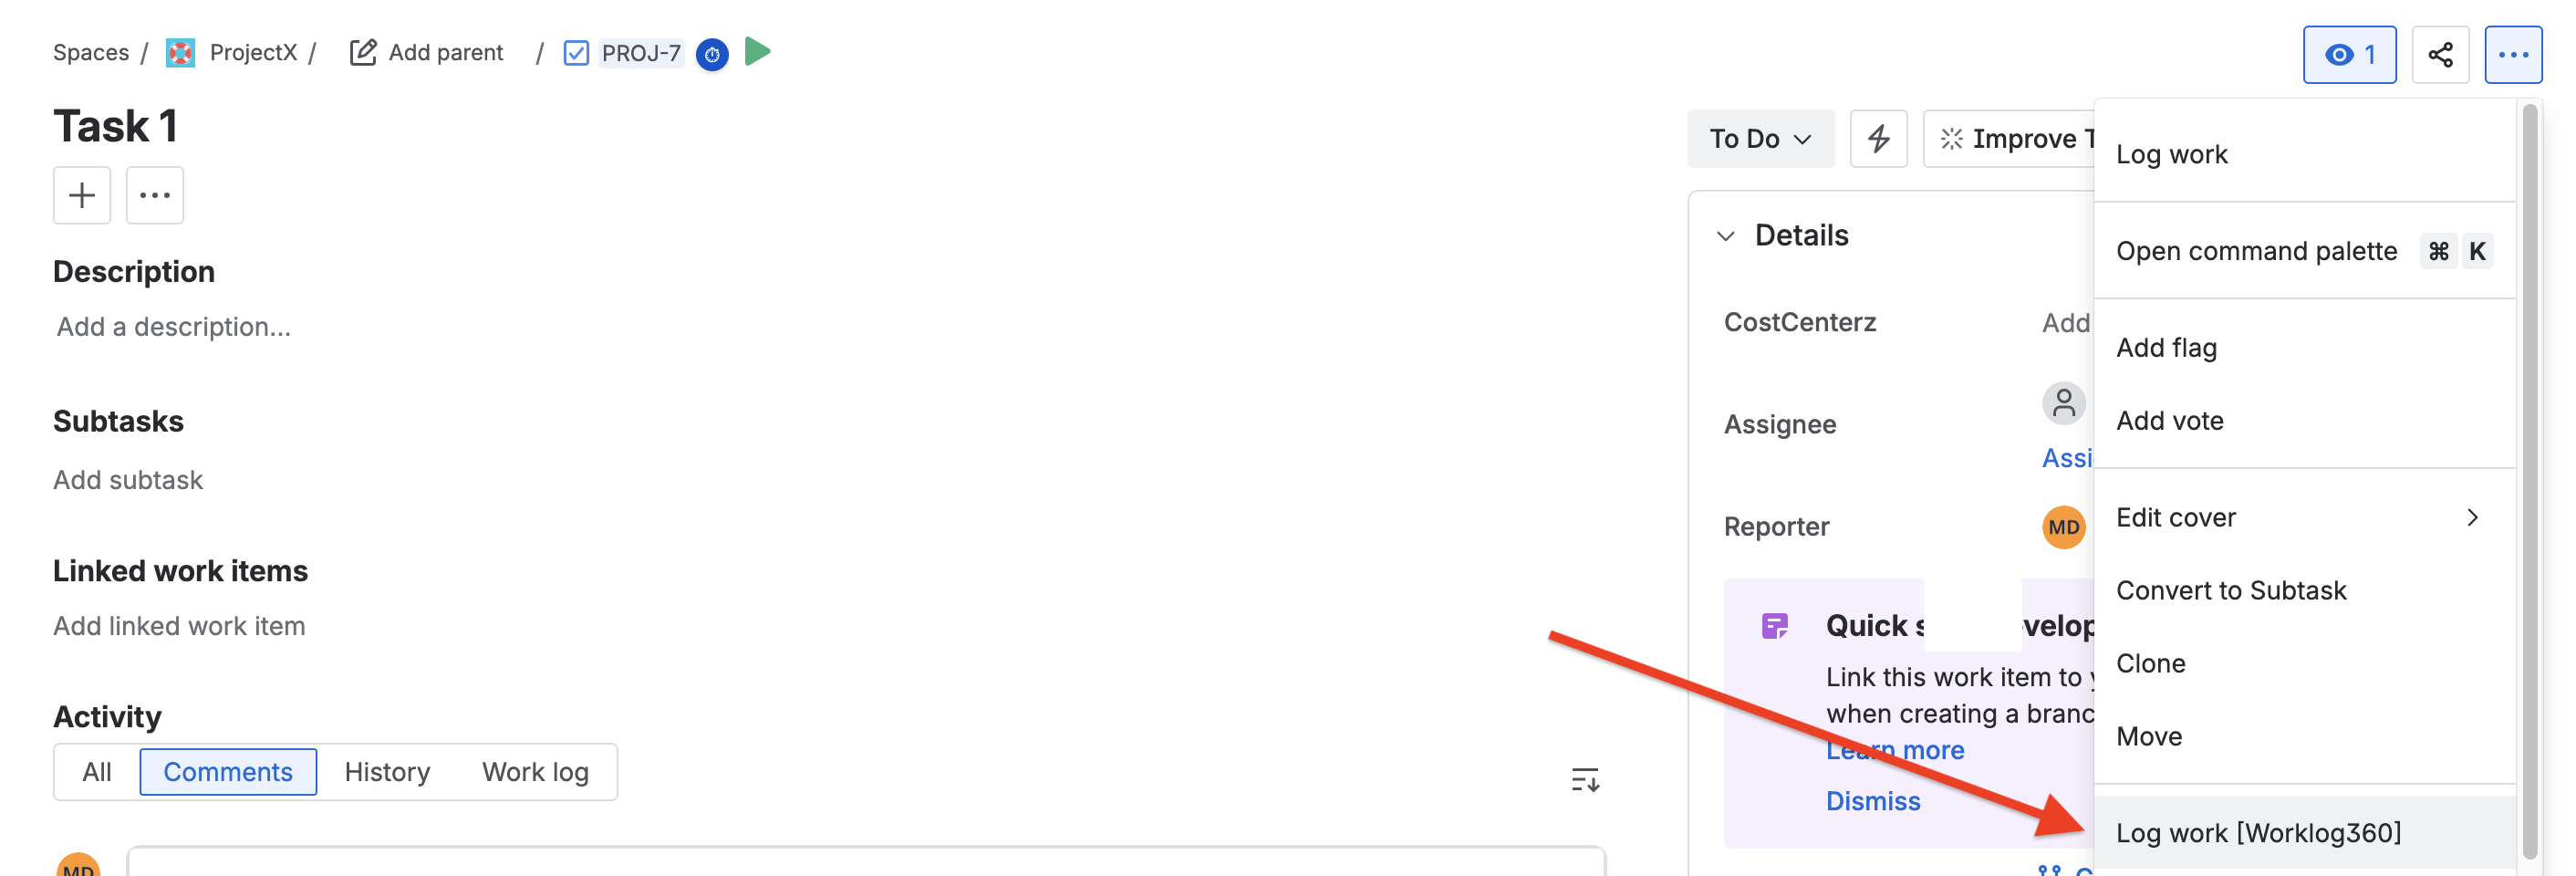
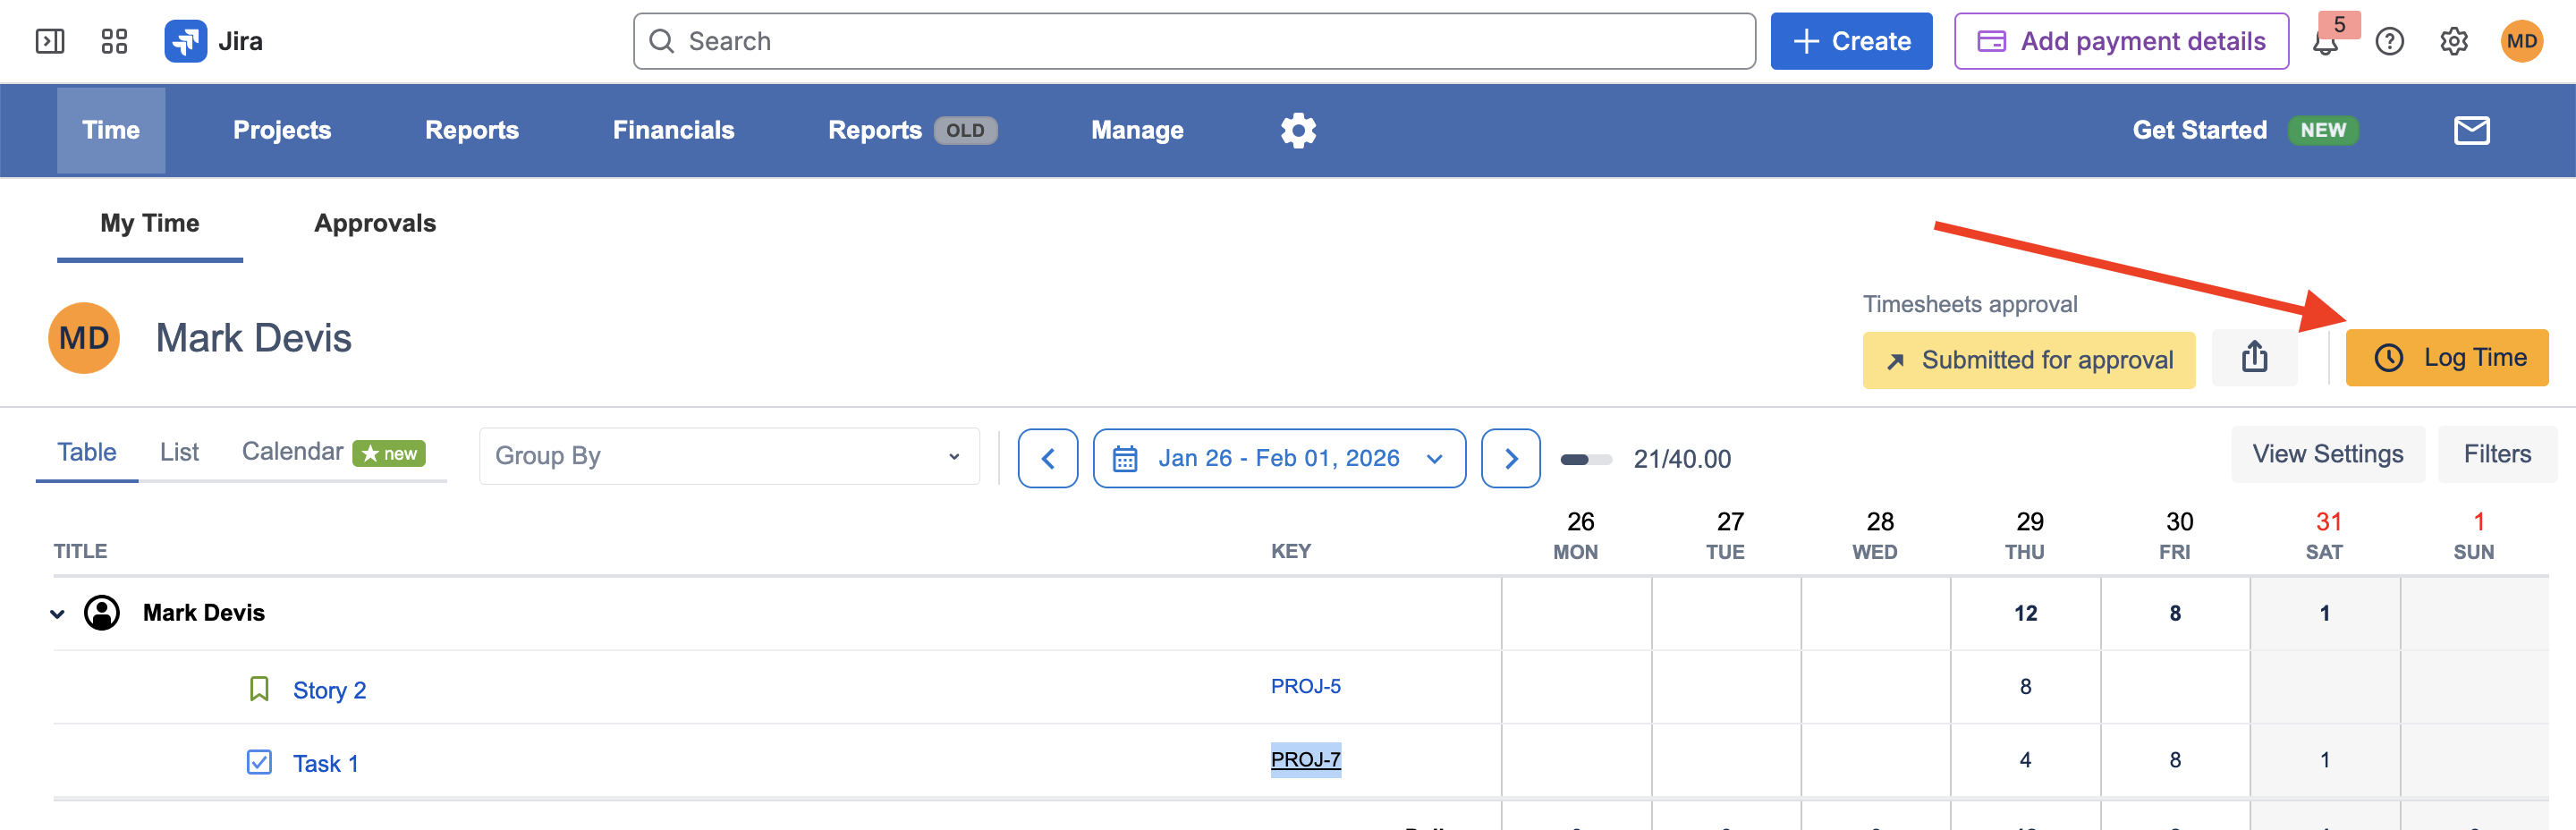
(or from the Worklog360 app → click Log time).
Step 2: Enter the time spent
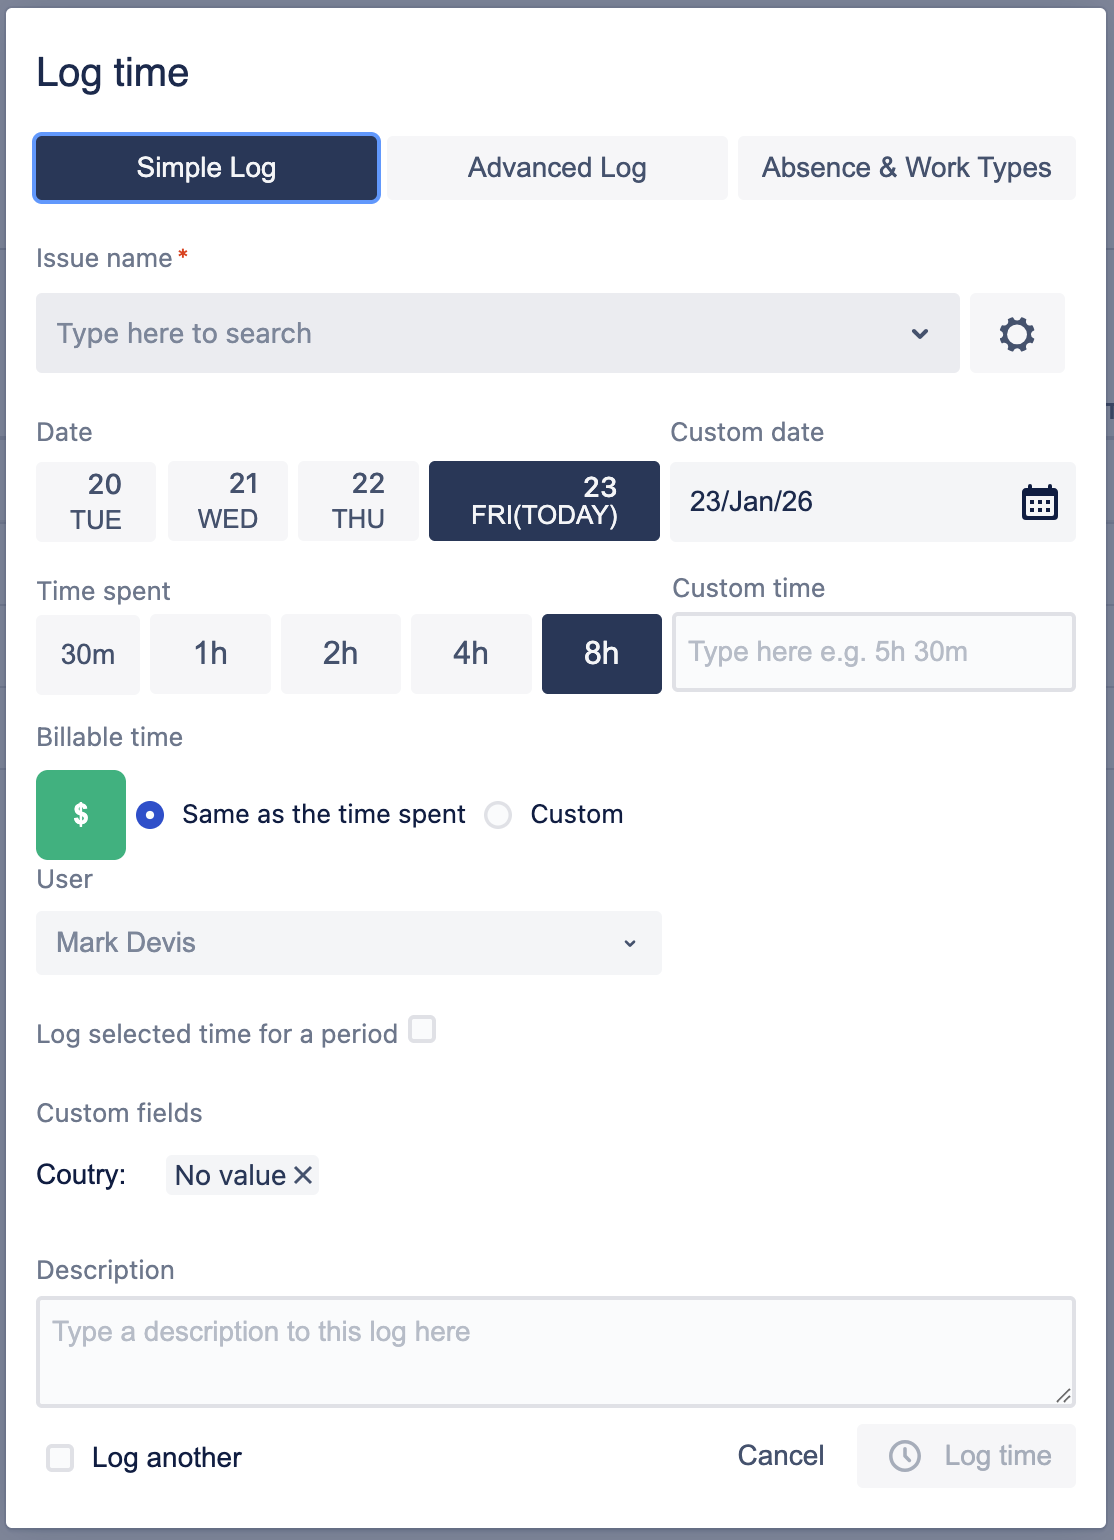
In the Time spent field, enter the number of hours you worked on the issue.
Example:
-
2h -
1h 30m
Step 3: Choose how billable hours are calculated
By default, all Jira projects are set automatically to be billable unless configured otherwise in Worklog360.
In the worklog form, locate the Billable hours section (💲 icon):

Billable hours options
-
💲 Billable (enabled - green button)
Billable time is active for this worklog.You can choose between:
-
Same as logged hours (default)
Billable hours will automatically match the time you logged. -
Custom billable hours
Enter a different number of billable hours if only part of the work should be billed.
-
-
💲 Billable (disabled - grey button)
If you click the 💲 button to turn it off, billable hours are set to0, and the worklog is treated as non-billable.
👉 To log billable time, keep the 💲 button enabled and use either Same as logged hours or Custom billable hours.